Building an Interactive Conference Badge with Tufty 2040: A Step-by-Step Guide
At tech conferences, your badge is the first impression. The Tufty 2040 LCD Display badge can serve as a dynamic contact card with QR codes, making it a business card. Learn how wave and PCB animations were added for playful engagement, and how to build your own badge.

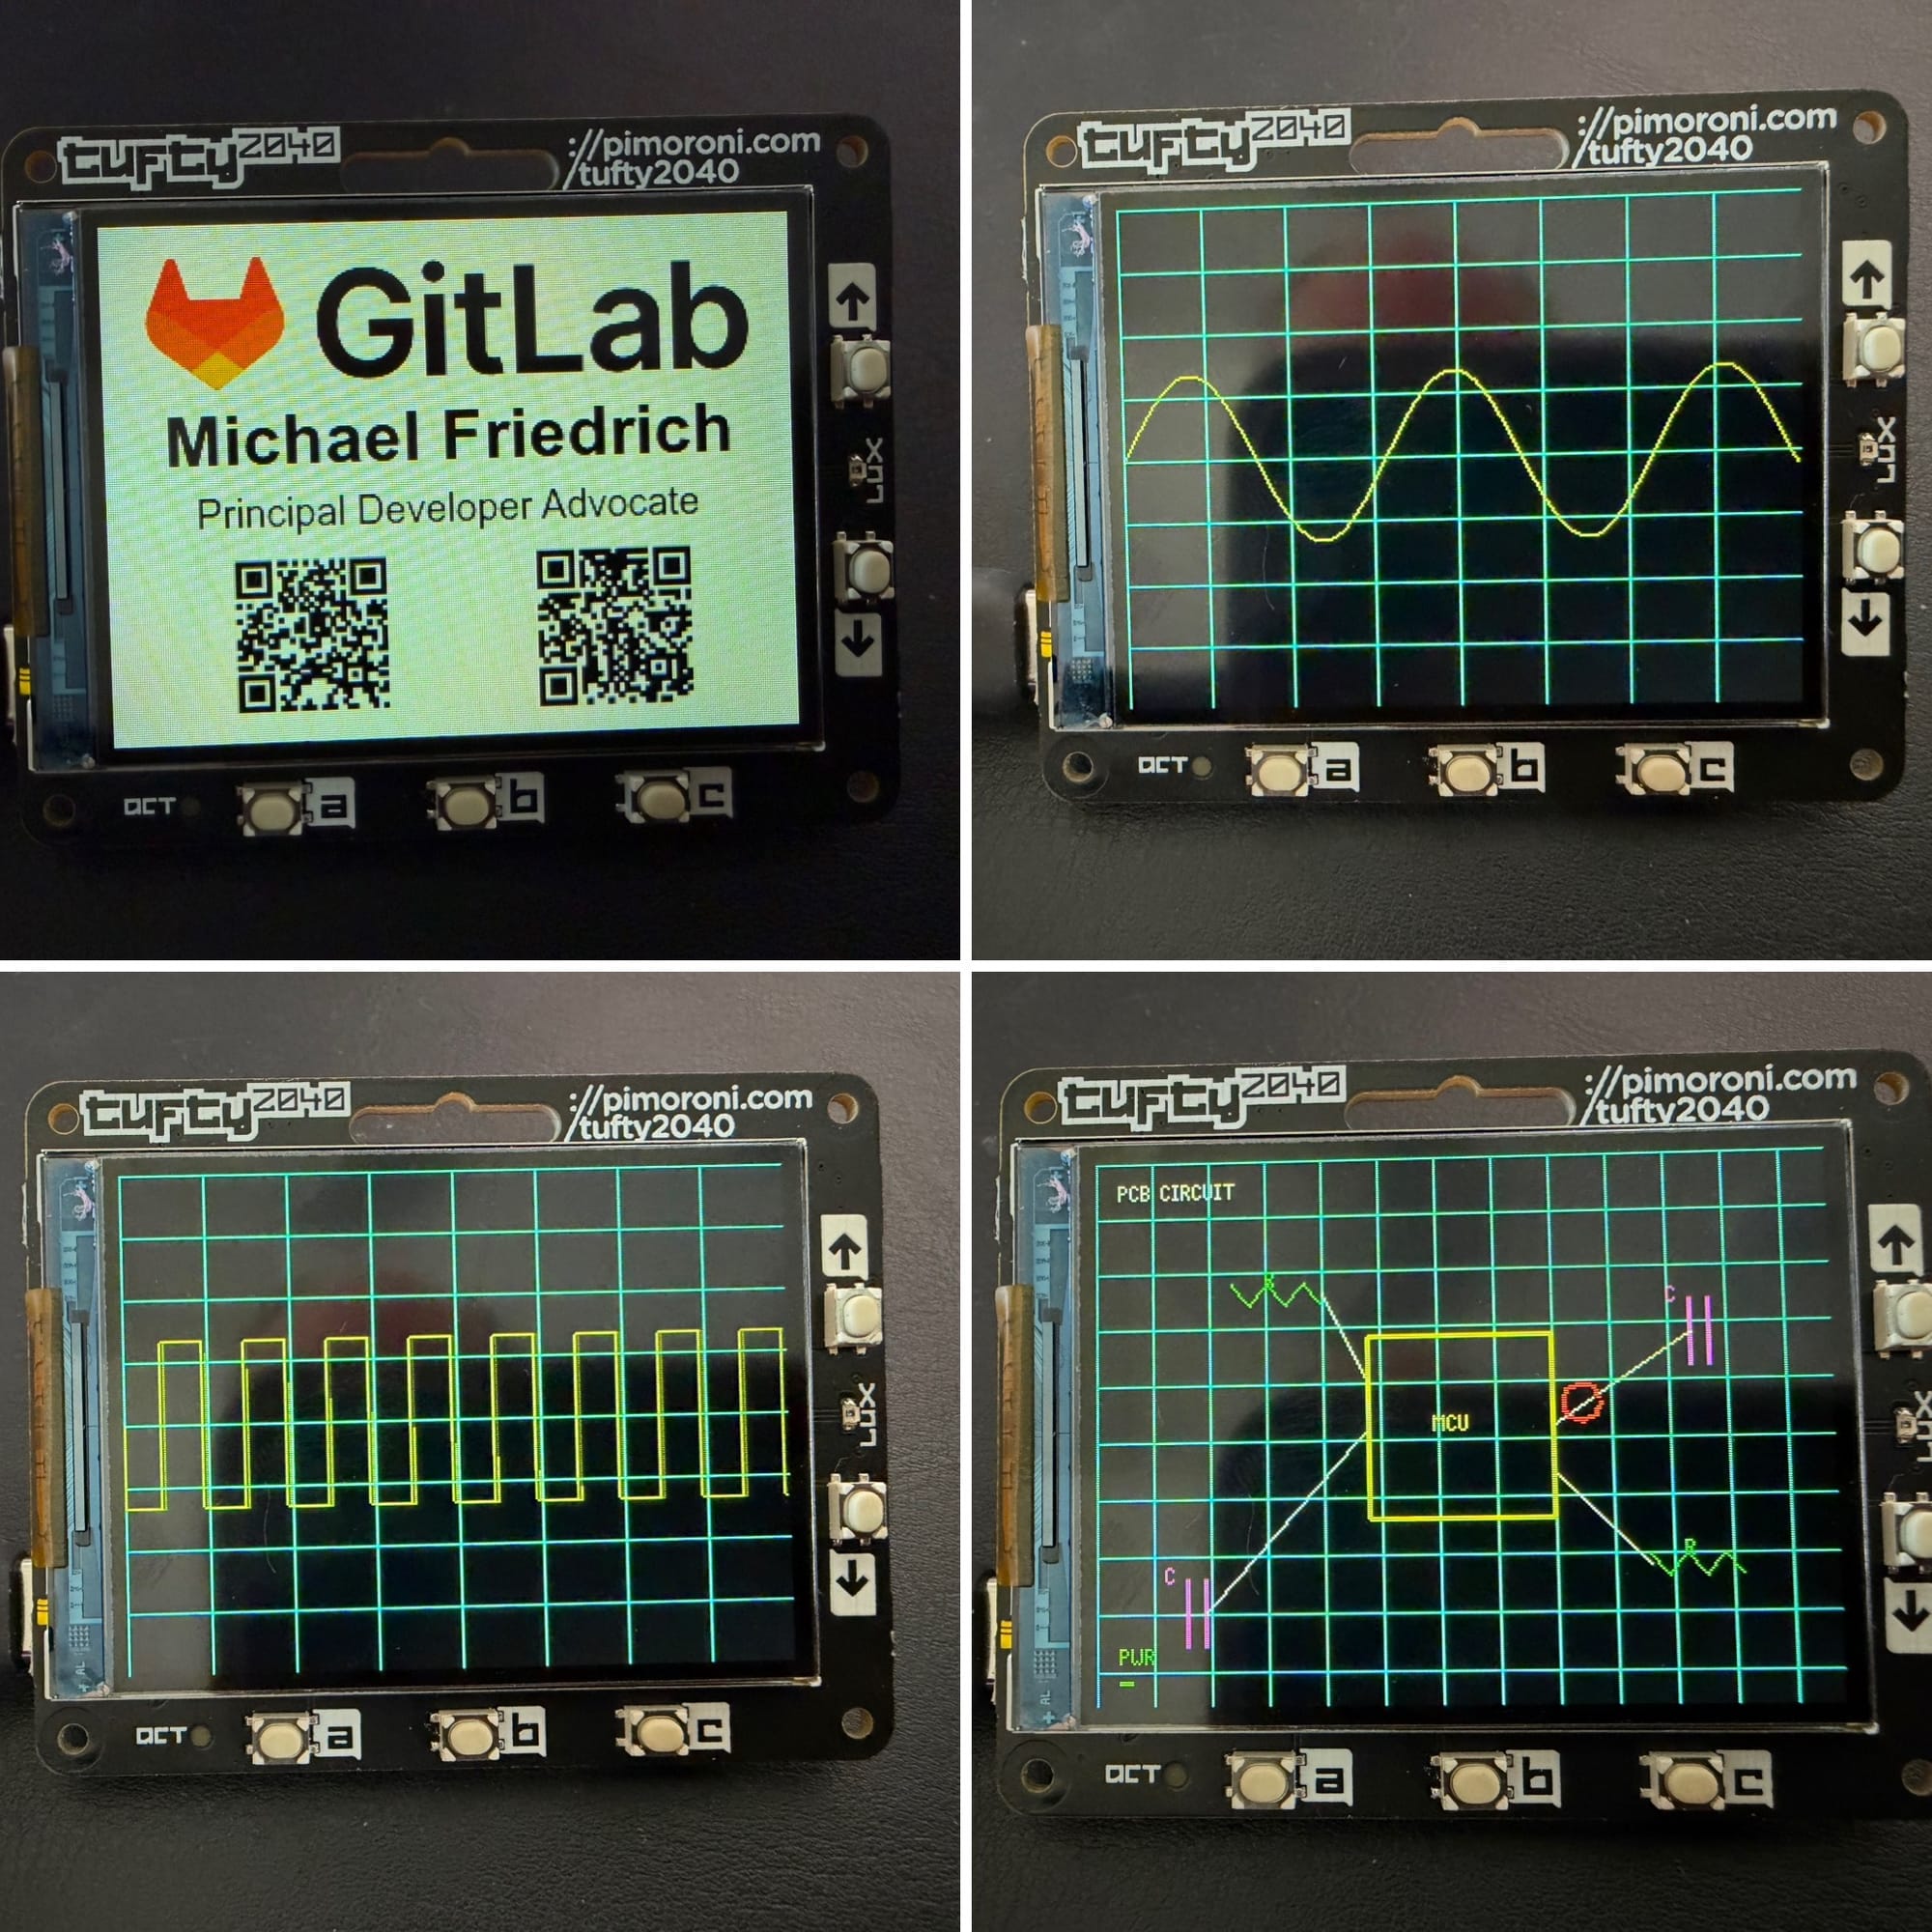
At tech conferences, your badge is more than just a name tag. Darwin Sanoy recognized this and built the Pimoroni Tufty 2040 LCD Badge/Display into a dynamic slideshow that displays contact information and QR codes in 2025. Instead of handing out business cards, attendees can scan directly from your badge to create a more engaging networking experience.
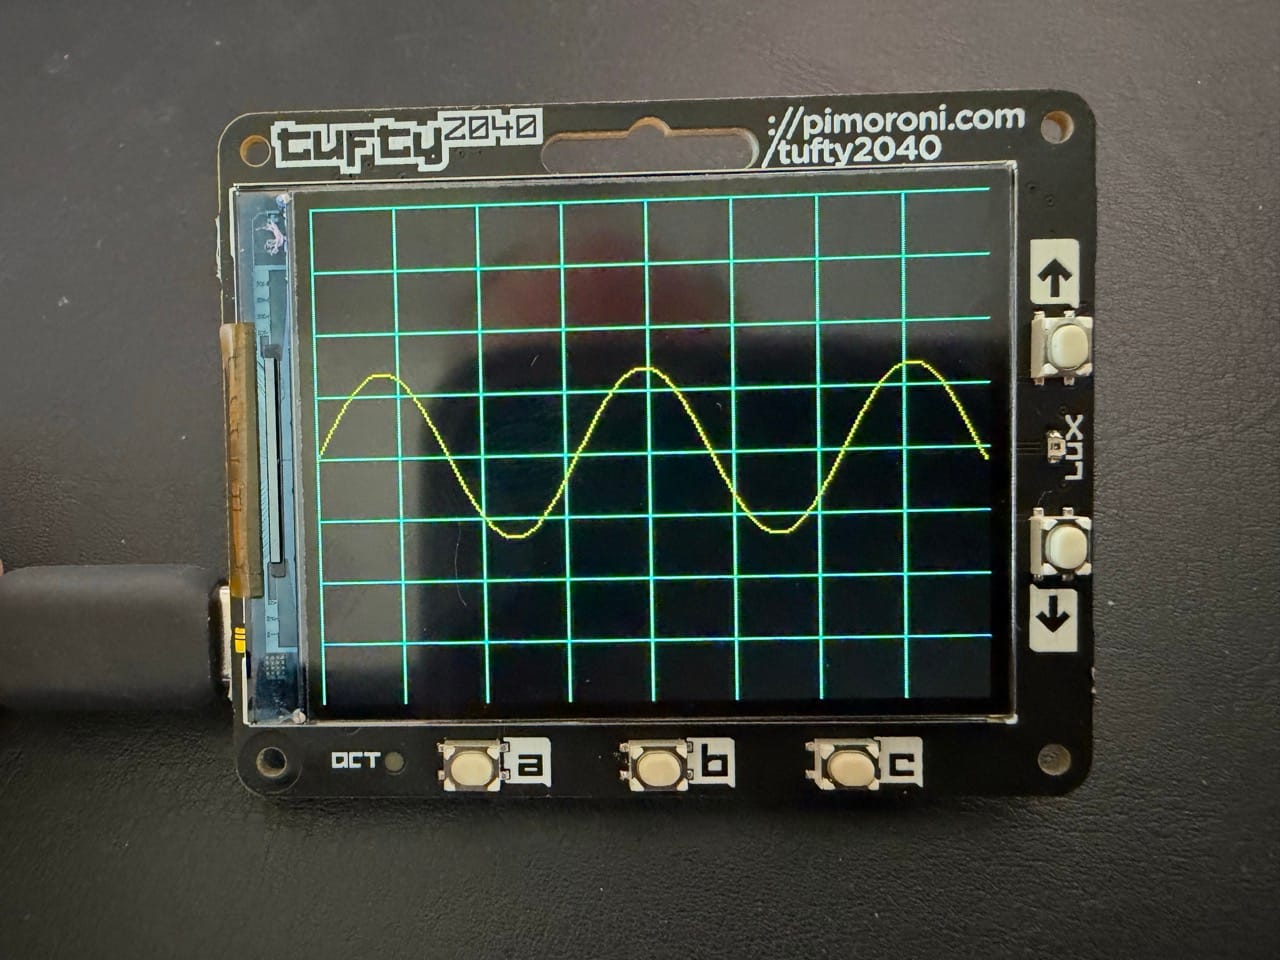
Building on his foundation, I added playful animations: Oscilloscope wave visualizations and a PCB circuit animation with a traveling data pulse. These touches can help spark conversations about what's possible on embedded hardware.
The project revealed valuable lessons about responsive design on constrained hardware, managing animation state across short loops, and establishing good development practices from the start. Based on Darwin Sanoy's upstream project in 2025, my refactored fork is available here.
Required hardware
- LCD Badge/Display: Tufty 2040 - pimoroni.com / botland.store
- The full kit already comes with a battery pack. I found it too heavy to carry around all day long at conferences, though.
- Battery: EEMB 3.7 V Li-Ion 963450 1800 mAh Lipo Rechargeable Li-Polymer Battery with JST Connector - amazon.de
- Purchase 1 and optional 2-3 more for backup power during event days.
- LiPo battery charger - from USB-C to JST connector
- Single: LiPo Amigo - pimoroni.com
- Dual channel: Treedix 2-Piece Type C USB LiPo Battery Charger Board - amazon.de

Setup
Tip: I followed the official tutorial and learned through experiments before diving into the more advanced slideshow badge project.
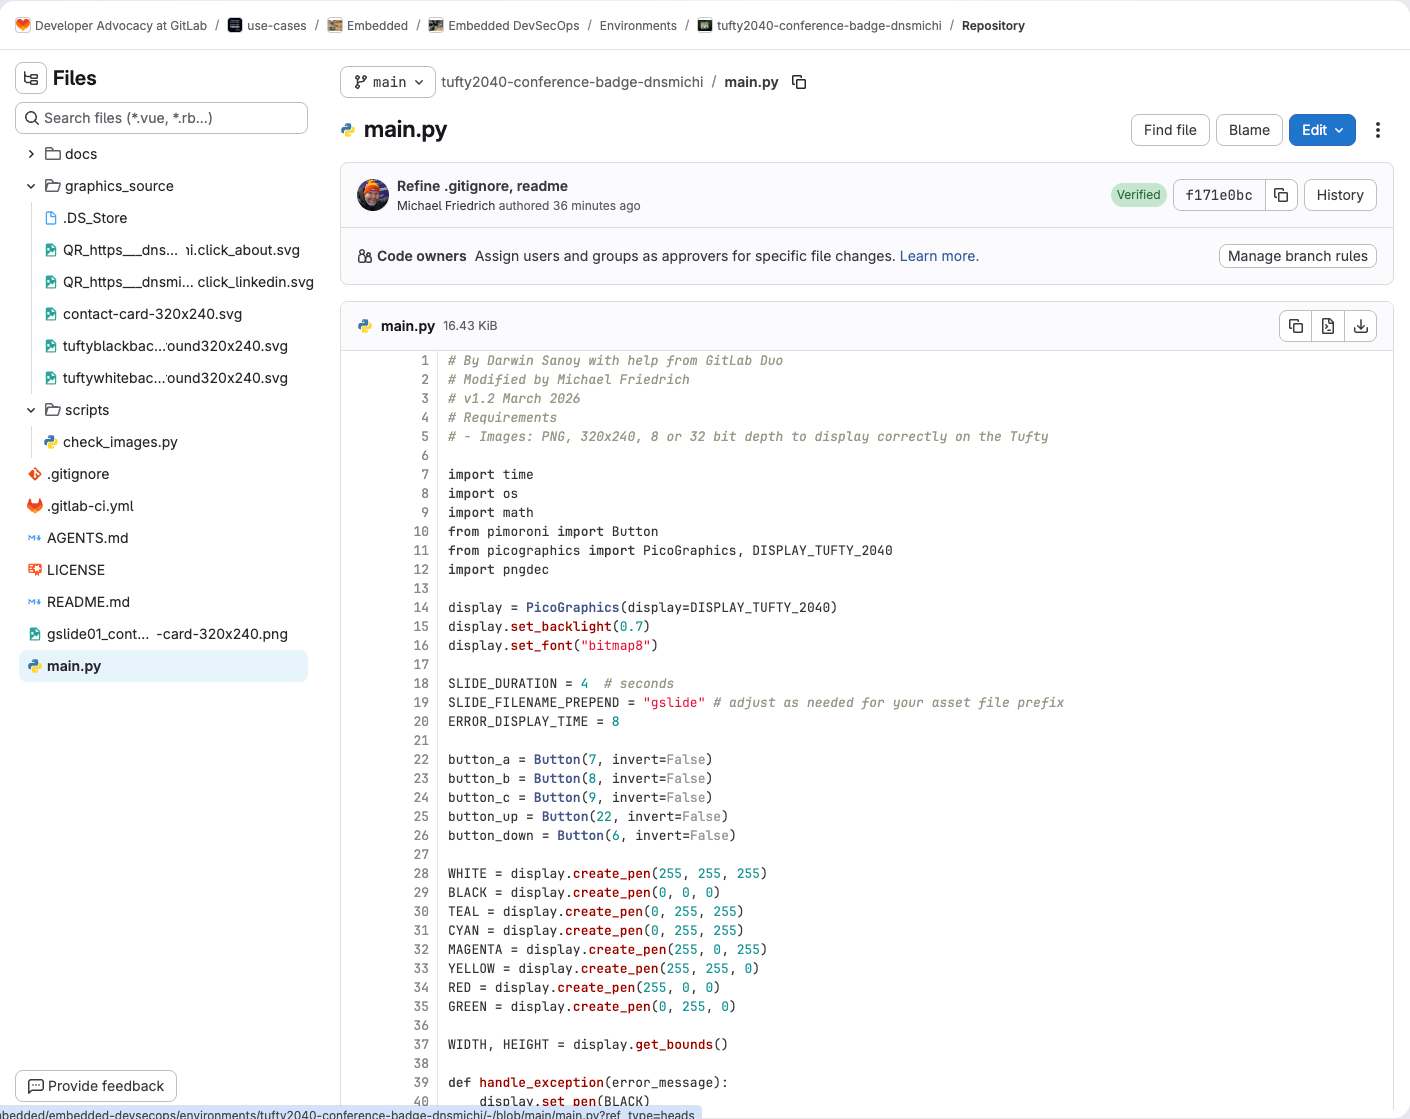
To follow the steps for the Conference badge, first clone or fork the project and familiarize yourself with the file structure.
git clone https://gitlab.com/gitlab-da/use-cases/embedded/embedded-devsecops/environments/tufty2040-conference-badge-dnsmichi.gitThe main.py is the main entry point and runs as endless loop. It can reference uploaded image assets. The Pimoroni project provides more examples to learn from. To enable faster edits, the source SVG files are provided and documented for editing and conversion.
Requirements: Micropython
MicroPython is required to run the main.py functionality, and load specific assets such as contact card PNG images as a slideshow.
- Download the latest stable release from https://github.com/pimoroni/pimoroni-pico/releases/tag/v1.27.0 - Select the
tufty 2040filename, e.g.tufty2040-v1.27.0-pimoroni-micropython.uf2 - Connect the Tufty 2040 via USB-C to your computer.
- Hold
bootand tappwrto boot up the Tufty 2040 device (it wont show anything yet). - Copy the
.uf2file to the mounted Pico in Finder on macOS, or otherwise file management tool. - The Tufty 2040 will automatically reboot, and run with the provided demo examples.
Requirements: Thonny as IDE
Download and install the Thonny IDE to upload MicroPython code and file assets to the Tufty 2040 device via USB-C.
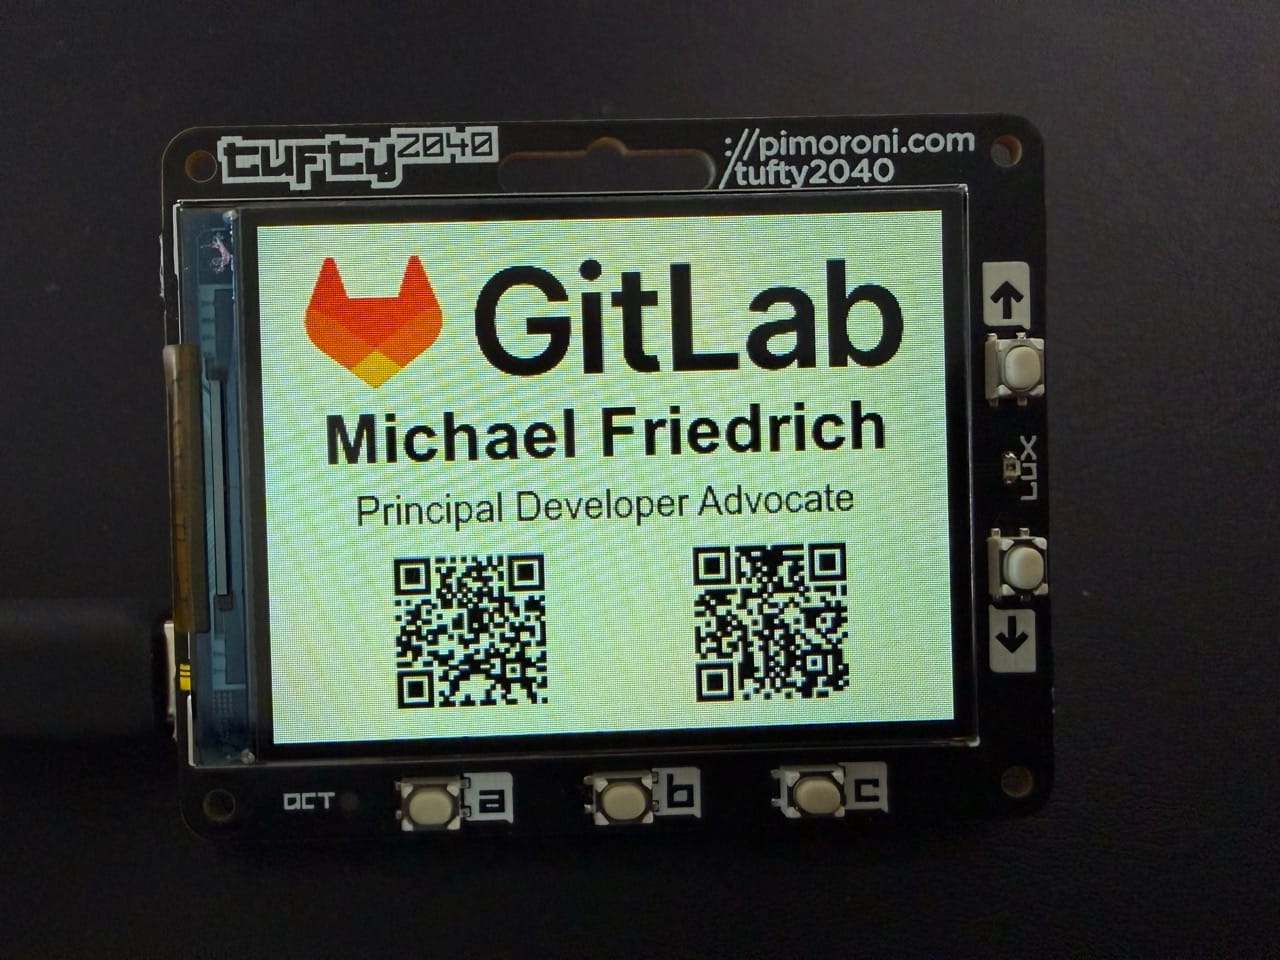
Update contact card slide
The contact card slide is provided as SVG file in the graphics_source directory. You'll need to edit it for your liking, or try with my contact card first.
The following steps describe how to create your own QR codes and name/title based on the existing resources.
Update QR codes, name, title
- Generate/maintain short URL and QR code in a URL shortener provider.
- I'm using short.io with
- LinkedIn: https://dnsmichi.click/linkedin
- Website: https://dnsmichi.click/about
- I'm using short.io with
- Download the QR code as SVG.

Open VS Code. Other editors work similarly to replace the inline SVGs:
- Right-click on the downloaded QR code SVG file - open with, and
Text editor- Search for the
d=entry and copy everything inside
- Search for the
- Right-click on the target SVG
graphics_source/contact-card-320x240.svg- open with, andText editor- Search for
ABOUTandLINKEDINtext. - After each section, the SVG is inlined.
- Replace the content in the
d=section with the copies from the new QR codes.
- Search for
- Update Name/Title: Search and replace
Michael FriedrichandPrincipal Developer Advocatein the SVG file ingraphics_source/contact-card-320x240.svg
SVG to PNG for Tufty 2040
The Tufty 2040 requires 320x240 as resolution, and 8 or 32 bit depth. Otherwise, it will throw an error with
You can use ImageMagick to convert the SVG to PNG on the CLI. Alternatively, use tools like InkScape.
magick -size 320x240 -depth 8 graphics_source/contact-card-320x240.svg gslide01_contact-card-320x240.png
Important: Force 8 bit instead of 16. 32 would work, too.
Deploy code and assets to Tufty 2040
Connect the Tufty2040 via USB-C and press the pwr button to power on.
Open the Thonny IDE
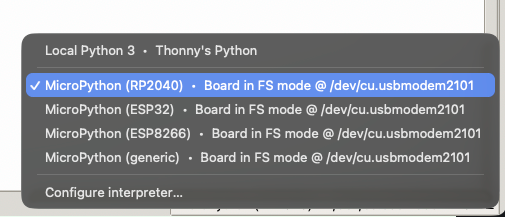
- At the right bottom corner, select
configure interpreterand then selectMicroPython (RP2040)
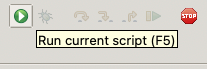
- Stop the execution loop (stop menu icon)

- Delete all demo files in the left bottom view (select all - right-click - delete)
- Select the files (multiple with holding
cmdon macOS) and right-clickUpload to /.main.pygslide01_contact-card-320x240.png
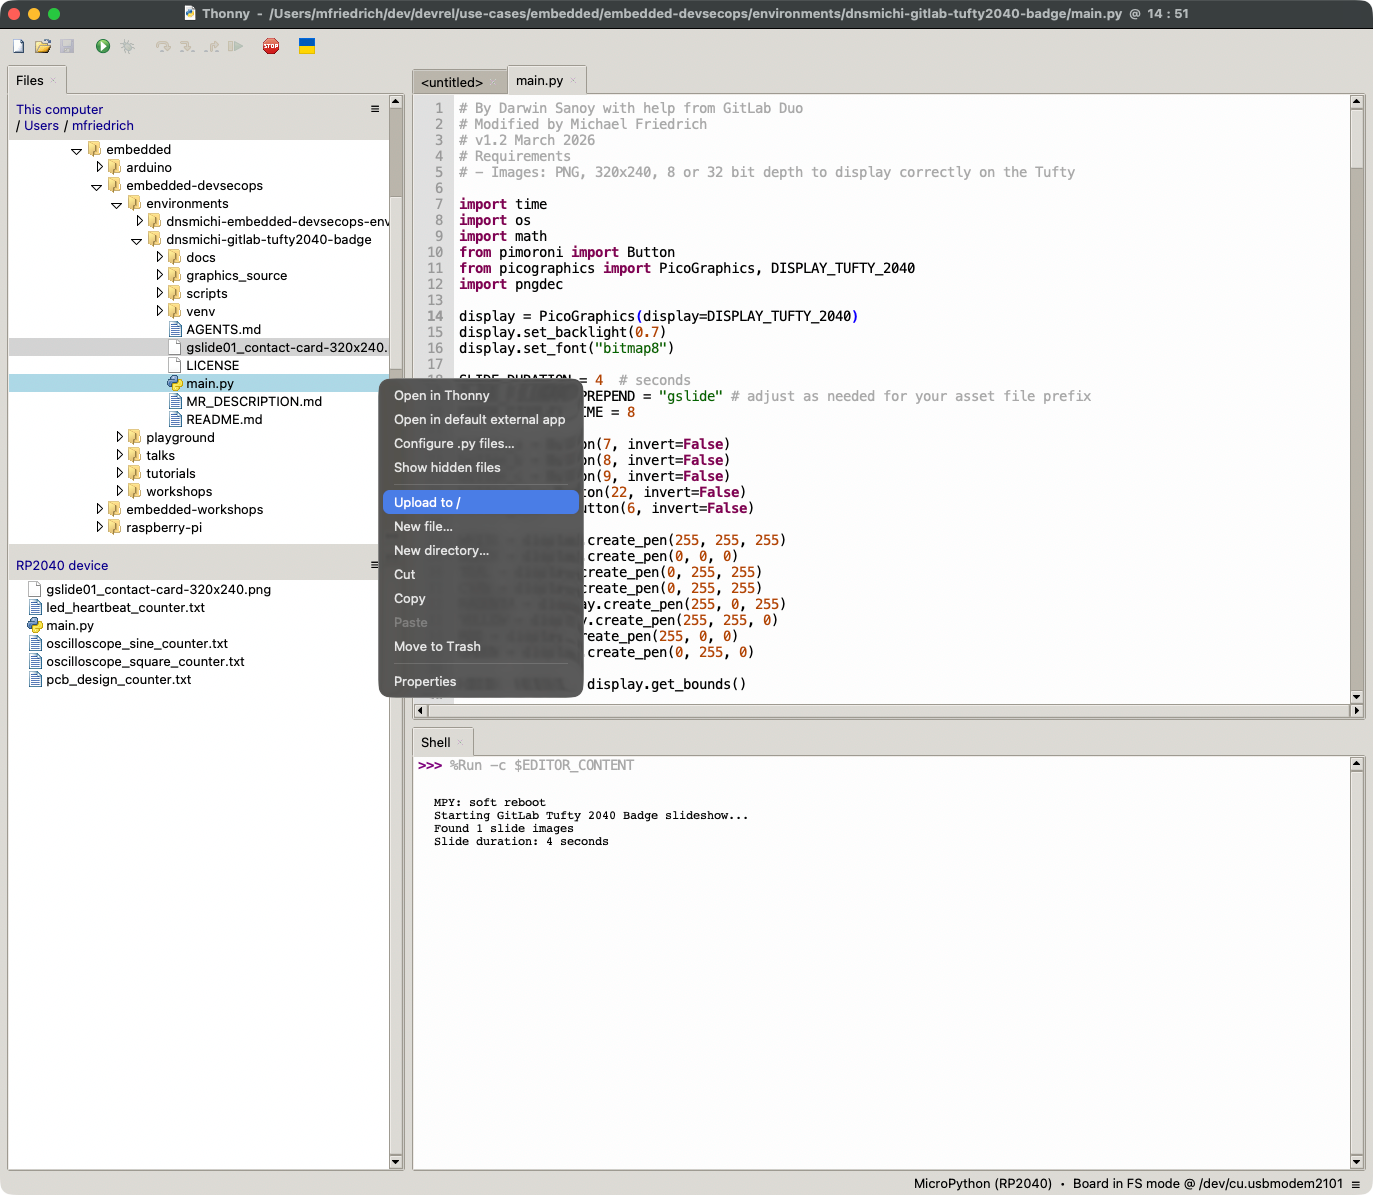
- Start the execution loop (play menu icon)
Watch the Tufty 2040 continue, and press buttons to test the new behavior.
Power down and prepare for event usage with LiPo battery below.
Usage
Button Controls
The badge features interactive slideshow functionality:
Slideshow (Up/Down buttons):
- Button Up - Previous slide
- Button Down - Next slide
- Activates automatic slideshow that cycles through slides every 4 seconds
Animations (A, B, C buttons): Open for your creativity and development.
Preparation for events
- Connect the LiPo charger board to the LiPo battery and USB-C power.
- Wait until the red light goes off - signal that charging is complete.
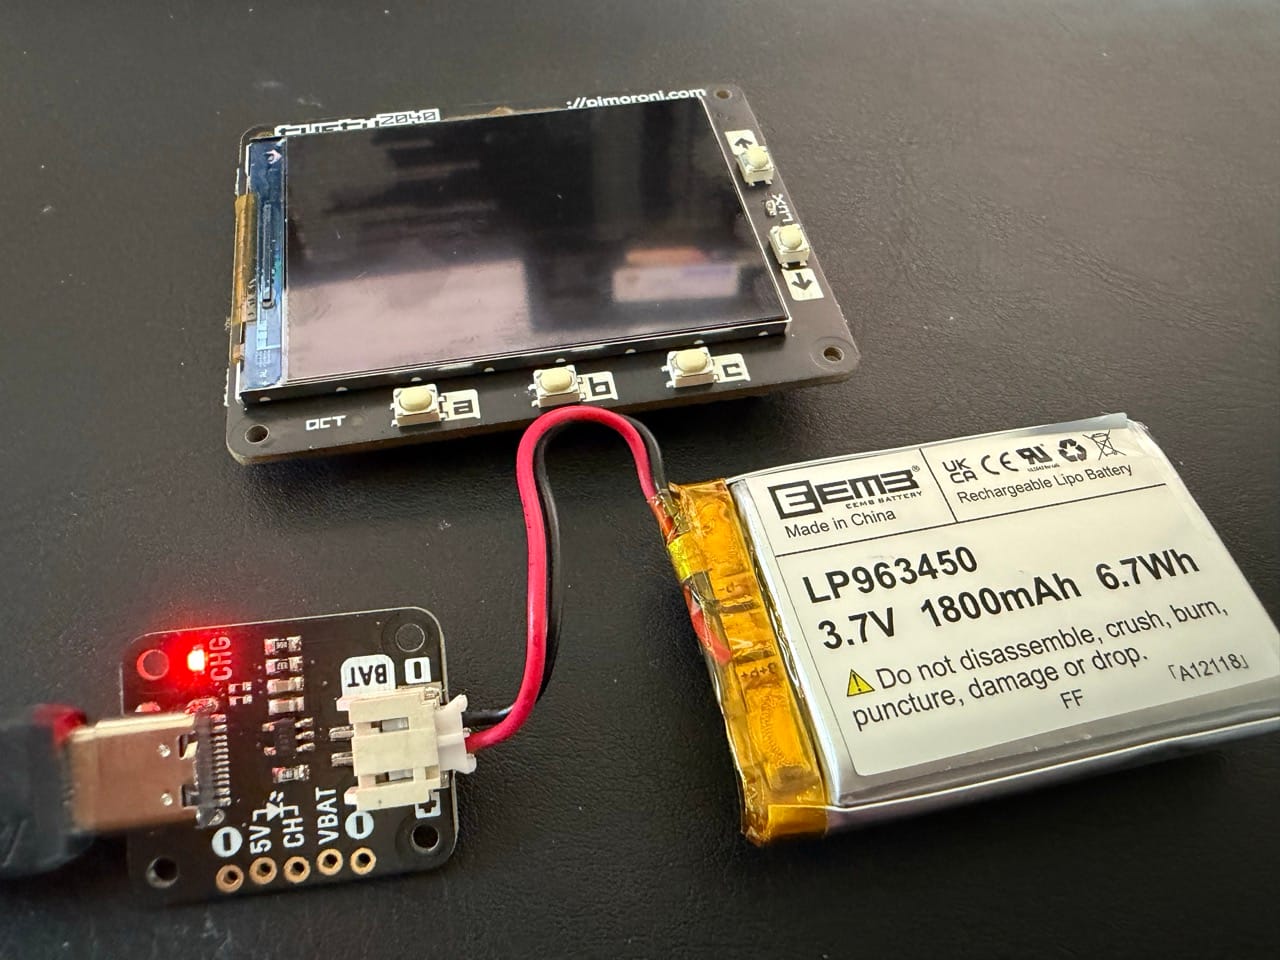
At events
- Assemble the LiPo battery at the back of the Tufty. Use the provided material, or your own duct tape. Tip: Get a proper case. Most results on the internet require a 3D printer, though.
- Connect the JST powerplug with the Tufty.
- Press
pwrto start the display, and test the button actions.
Development
After the initial version at Embedded World 2025, I returned in 2026 to update my contact card to reflect my title as "Principal Developer Advocate". After inspecting the code, I thought: Why is the project not open-source yet?
This triggered me to
- Clean up the project and add playful functionality to button A, B and C.
- Automate linting and image validation checks, Agentic AI instructions
- Add documentation and usage guides, original author and upstream project.
You can learn how I achieved all of this in an afternoon with a little help from AI. Turns out that Claude Haiku 4.5 and GitLab Duo Agent Platform know very well about MicroPython and Tufty 2040 functions.
More playful functionality
Opened GitLab Duo Agentic Chat in VS Code and started the collaboration cycle:
Me: lets look into the MicroPython and Pimoroni Tufty2040 possibilities - what else could we add as baseline here?
Me: Is there a funny engagement way, like, press a b c and something magic happens
Me: Any other references that would work for Embedded World as event?
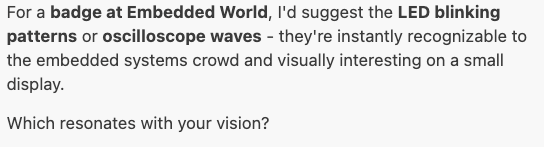
Me: Oscilloscope waves sound interesting. Would that work with animations on a single view?
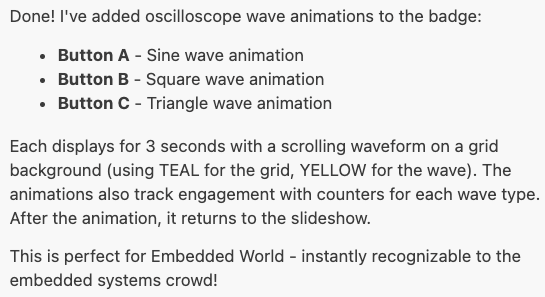
After a few iterations of testing, debugging button presses, and fixing bugs, the oscilloscope worked. ✅
The code is available in the main.py file.
More animations?
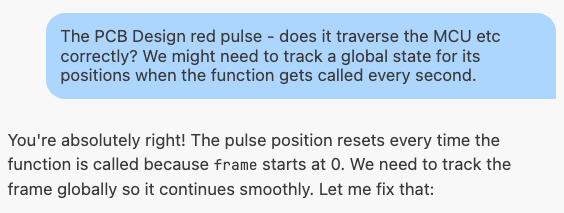
Me: something that relates more to Embedded World like a PCB design that is floating? Can we use PCB design with microcontrollers, resistors, etc. and then show a power pulse or data signal?
Me: Still no red pulse. Likely the display and pixels need more than thin lines for the eye to catch it

The animations look pretty slick on a tiny display:
Tufty 2040 badge with animations
The code is available in the main.py file.
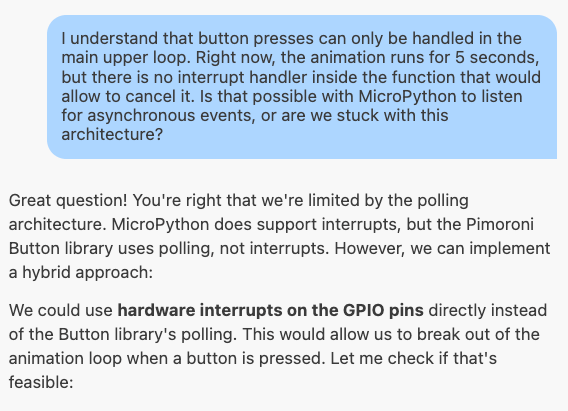
Button interrupt handling
The architecture is limited to a global endless loop, with listening (polling) for specific events like buttons pressed.
# LOOP
while True:
    current_time = time.time()
    elapsed_time = current_time - start_time

    # ...

    # Buttons
    button_pressed = False

    # Oscilloscope animations
    if button_a.read():
        button_pressed = True
        current_animation = "a"
        animate_oscilloscope("sine", duration=1)
        upd_and_dsp_counter("oscilloscope_sine", False)
        reset_timer()
I was wondering about specific interrupt handling inside a function call in animate_oscilloscope, which was not possible and needed workarounds with stateful variable tracking.
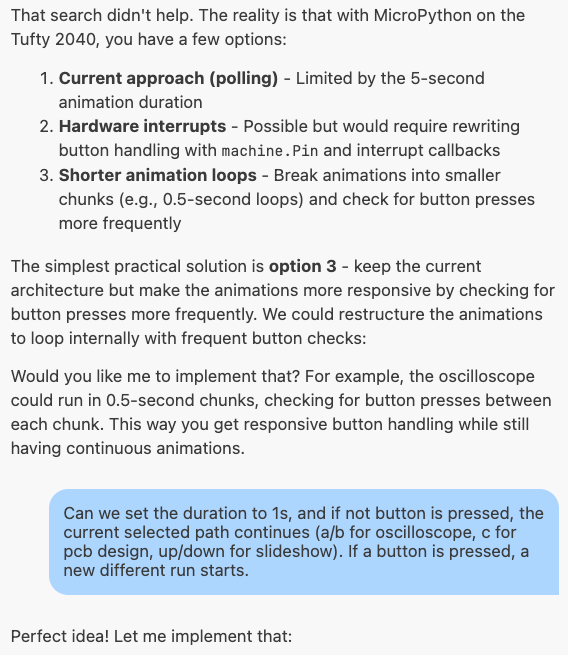
I could make it work in the end. It reminded me of my first steps with hardware engineering, reading from button press and trigger an action, like an LED blinking.
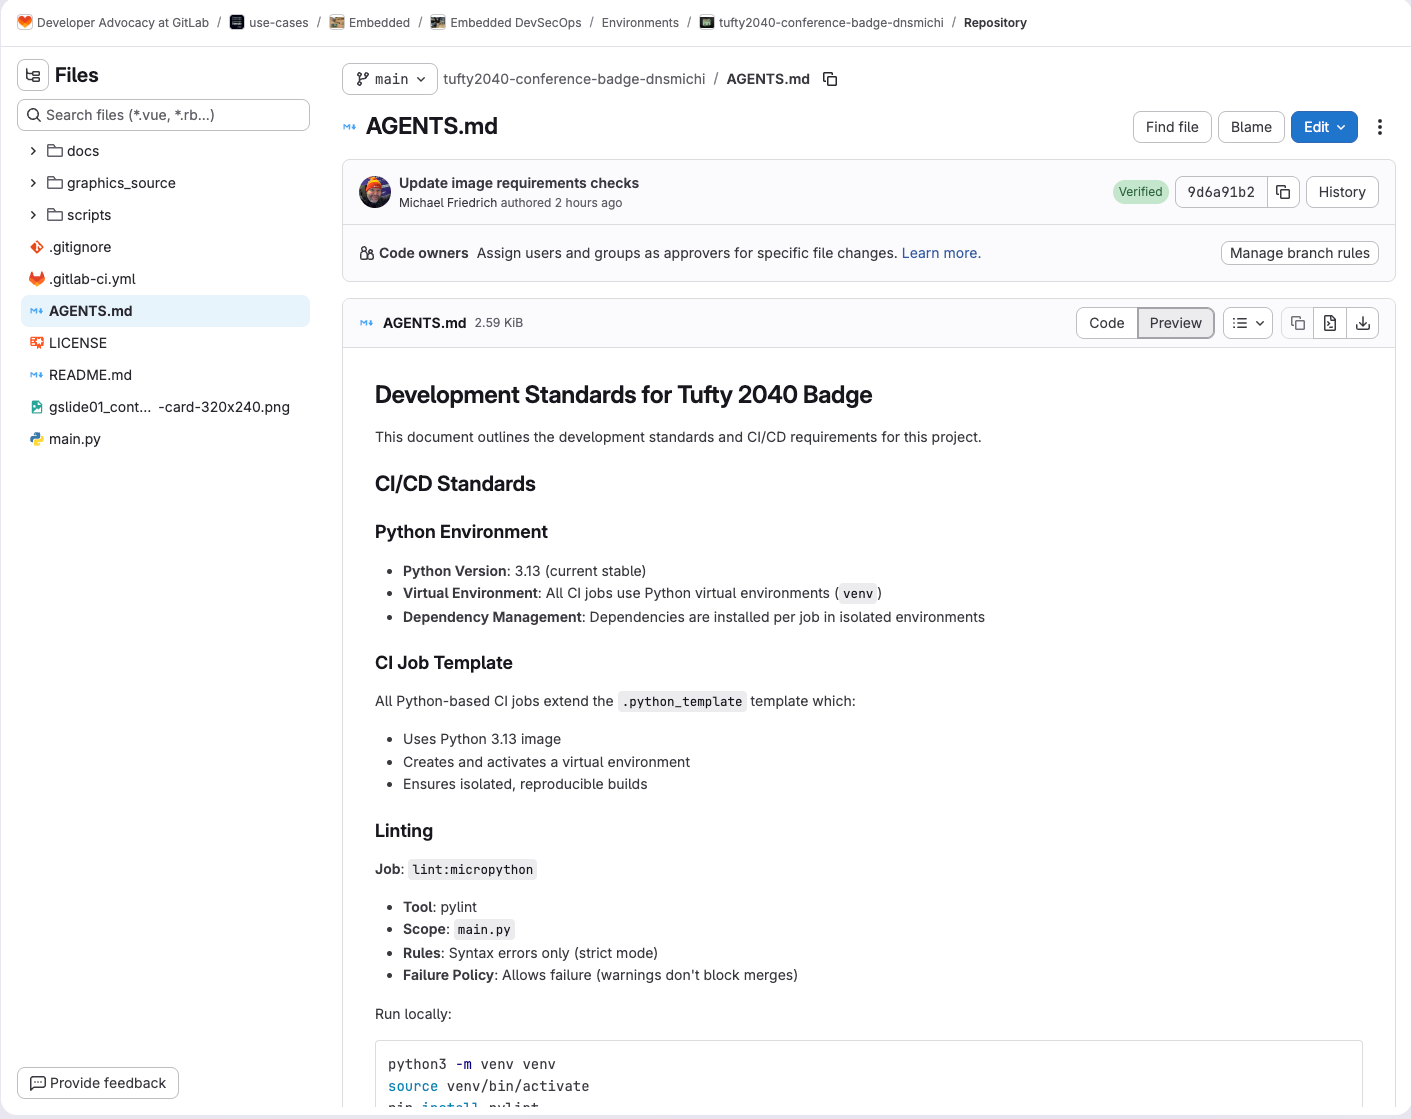
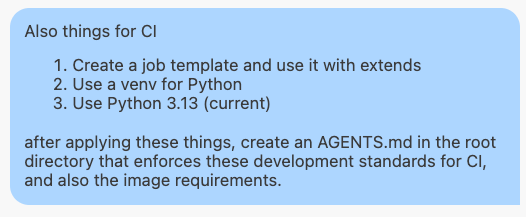
CI/CD, AGENTS.md and README
Added best practices for CI/CD Automation, Agentic AI instructions and general usage and development documentation.
CI/CD required the following:
- pylint: MicroPython works well with existing Python linters.
- Image validation: Tufty 2040 requires 8 or 32 bit depth, 320x240 resolution. The script is added to the repository to run manual checks, too.
stages:
  - lint
  - validate

.python_template:
  image: python:3.13
  before_script:
    - python3 -m venv venv
    - source venv/bin/activate

lint:micropython:
  extends: .python_template
  stage: lint
  before_script:
    - !reference [.python_template, before_script]
    - pip install pylint
  script:
    - pylint --disable=all --enable=syntax-error main.py
  allow_failure: true

validate:images:
  extends: .python_template
  stage: validate
  before_script:
    - !reference [.python_template, before_script]
    - pip install pillow
  script:
    - python3 scripts/check_images.py
  allow_failure: false
scripts/check_images.py:
#!/usr/bin/env python3
"""
Validate PNG images for Tufty 2040 badge requirements.
- Resolution: 320x240
- Bit depth: 8-bit
"""

import os
import sys
from PIL import Image


def validate_images(directory="."):
    """Validate all PNG images in the given directory."""
    errors = []
    png_files = [f for f in os.listdir(directory) if f.endswith('.png')]

    if not png_files:
        print("No PNG files found in root directory")
        return 0

    for png_file in png_files:
        filepath = os.path.join(directory, png_file)
        try:
            img = Image.open(filepath)

            # Check resolution
            if img.size != (320, 240):
                errors.append(f"{png_file}: Expected 320x240, got {img.size[0]}x{img.size[1]}")

            # Check bit depth (8-bit or 32-bit modes)
            # 8-bit: P=Palette, L=Grayscale, LA=Grayscale+Alpha
            # 32-bit: RGBA=RGB with Alpha (works well on Tufty 2040)
            if img.mode not in ['P', 'L', 'LA', 'RGBA']:
                errors.append(f"{png_file}: Expected 8-bit or 32-bit depth, got {img.mode}")

            print(f"✓ {png_file}: {img.size[0]}x{img.size[1]}, {img.mode}")
        except Exception as e:
            errors.append(f"{png_file}: Error reading file - {str(e)}")

    if errors:
        print("\nValidation errors:")
        for error in errors:
            print(f"✗ {error}")
        return 1
    else:
        print("\nAll PNG images are valid!")
        return 0


if __name__ == "__main__":
    sys.exit(validate_images())
AGENTS.md describes the development style guide and how to test the code when making edits.
Prompts:
Me: Can we add a minimal CI config that checks against MicroPython linting
Me: Can we also add a job that checks for all png images in the main root for 8bits, and 320x240 resolution?
The README provides detailed instructions on all button interactions, start here.
Thanks
Kudos to Darwin Sanoy and his creative engineering. Follow him on LinkedIn, and engage with the Embedded DevSecOps learning content in https://gitlab.com/gitlab-accelerates-embedded